Tire Rack

Since I bought my new rims and tires I have had the old rims and tires in the way. No matter where I put them they were in the way. Then one day surfing the web I came across this post about someone who made their own tire rack. I took a look at their design and I thought about the material I had in the garage. I figured I could put one of these together with out any costs.
So...... I gave it a whirl.
Here is the url to the thread that gave me the idea: TIRE RACK
I also put the thread on a word doc: TIRE RACK WORD DOC
So...... I gave it a whirl.
Here is the url to the thread that gave me the idea: TIRE RACK
I also put the thread on a word doc: TIRE RACK WORD DOC
|
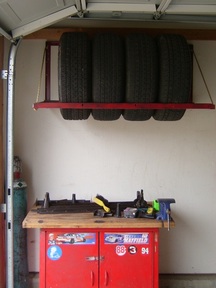
Here are the basic steps that I did. Much like the post on the internet that I read.
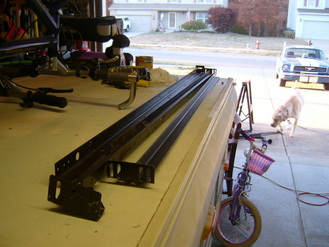
I had some old bed frames that I used for the material to build this with. I also used rope instead of chain. I will get some chain later to make it a little stronger. I ran out of red paint when I painted this so that will have to wait until I get some more. I cut the following from my scarp bed frames: 4 x 4' lengths (fits sport wheels and tires for width) 2 x 2' lengths (Vertical sections) 2 x 20" lengths (extensions from wall) |
 |
|
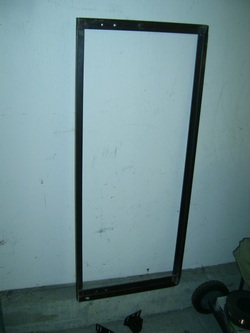
WALL SUPPORT SECTION
Make a square frame 2' x 4x. I put the 4' pieces down and then over lapped them with the 2' pieces. I drilled holes in the top sections for the chain to go threw. Try and be accurate for both sides to make it even. I also drilled holes along the 2' sections for mounting this in the wall. Then some extra holes for the 4' sections so I can use them for mounting as well. I used a square to be sure that ever thing was squared up. Then I welded things into place. |
 |
|
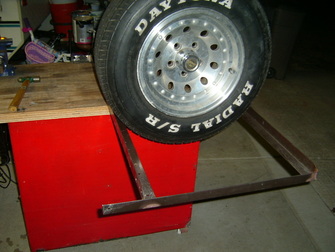
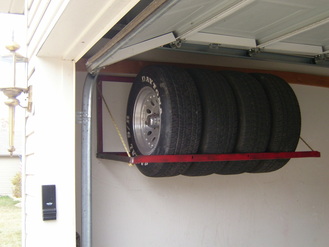
BOTTOM SECTION
Then I again squared up the tire rack holding piece. I set up the two 20" pieces first and squared them up to the out side 4' piece. I tacked them up and then used some claps to hold the 2nd 4' piece in place and put a tire on there to test measure that I had the spacing right. The 2nd 4' piece does not go up against the wall. It is about 10 or 12 inches away so the tires don't hit the wall. Once I had things where I wanted them I welded every thing up and then grinded down the ends that will attach to the top section to a curved. This will allow the rack to fold up and down. Then a test fit and I was happy. Grind the ends of the 20" pieces that will nestle into the rack so that they can rotate up INTO the vertical section for storage. In other words, round off the square end that will rotate so that it will not interfere with the rotation. Then drill the holes for the bolts and for the chains. Measure twice and drill once. |
  |
|
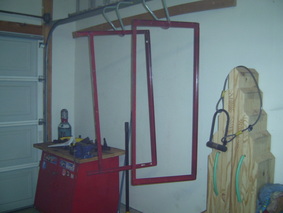
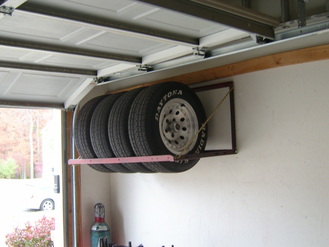
FINISHING I used what I had left of red spray paint on this and let dry. The next day I mounted the top piece to the wall. I was very happy that I measured my stud lengths in the wall with a stud finder before I started and made sure my 4' lengths would work. This made securing the top section a snap. Be sure it is mounted securely. You don't want your rims and tires ripping the rack out of the wall and falling on to your car or worse someone.
I then bolted up the bottom section. Then I used some lengths of climbing rope that I had and put a knot in one end of the lengths. Then strung the rope through the holes I had made. Using a level I tied each rope (one for each side) to account for stretch and YOU ARE DONE! |
 |
 |
 |
