A starting point

This was posted on FordMuscle
My dash is not the best looking. I think it could really use some custom touches but with keeping my budget tight I don't have a lot of options. I would love to have the money to get one of the aluminum bezels with the nice high end white faced racing gauges but I don't. The problem I see with that is this. The basic stock ford gauges when properly hooked up do a fine job of letting me know what I need to. So I don't see a reason to change them. Not sure there is a huge benefit for my money. What I don't like about the gauges is the back back ground. This makes them harder to read in my opinion, especially at night. So what is the solution?
My dash is not the best looking. I think it could really use some custom touches but with keeping my budget tight I don't have a lot of options. I would love to have the money to get one of the aluminum bezels with the nice high end white faced racing gauges but I don't. The problem I see with that is this. The basic stock ford gauges when properly hooked up do a fine job of letting me know what I need to. So I don't see a reason to change them. Not sure there is a huge benefit for my money. What I don't like about the gauges is the back back ground. This makes them harder to read in my opinion, especially at night. So what is the solution?
Affordable!
I had read about this kit in the magazines and even saw them at the vendors shops but they always wanted what I thought was an inflated price for this product. So I got on to ebay and started looking at gauges and found that I could get this kit for around $20 from a vendor named 'customegauges'. They were great to deal with and everything was as promised. With my new white gauge overlays in hand, I removed my bezel and cluster and got to work.
A few upgrades
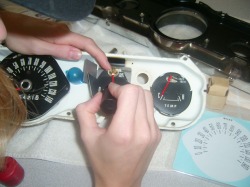
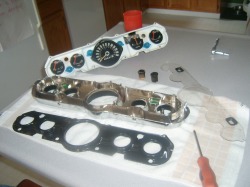
A while back I picked up a very nice 66 GT black case bezel. I figured this was as good a time to put it into my car as any other time. I pulled things apart and found that I had one blown bulb so I decide to replace all the bulbs. This is a good time to upgrade to LEDs if you like. Before I install my overlays I wanted to freshen up the needles. For this task I talked my wife into donating her time and some nice red finger nail polish. I figure it is as good as model paint or a sharpie marker. It turned out pretty good!
Install
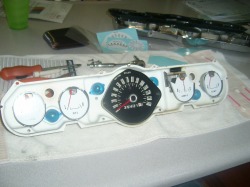
To install the overlays, I used some Q-tips and a glass of soapy water (dish soap). I dipped the Q-tip and swabbed it on the surface of the gauge face. Then I carefully pealed the gauge overlay off the backing and carefully placed in to position. With the soapy water you can slid it around and adjust as needed. Once it was all lined up. I used some dry clean Q-tips to push out the soapy water and bubbles. Then again using Q-tips I dried off the gauge edges and face. Now I have a white gauge face! I continued with the same steps for the rest of the gauges.
Finished the install
Once everything is all done the results speak volumes. I am very happy with how easy it is to do. I am confident that my 5 year old could do this. What do you think?
Before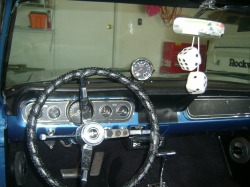
Nothing wrong with the way this looks before
|
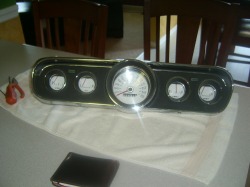
After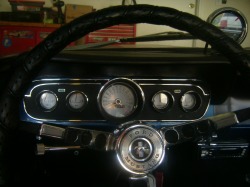
Looks much better now. A little pop with out screaming look at me! It even looks better at night.
|
